Woodworker's Journal 2004 Summer, страница 62
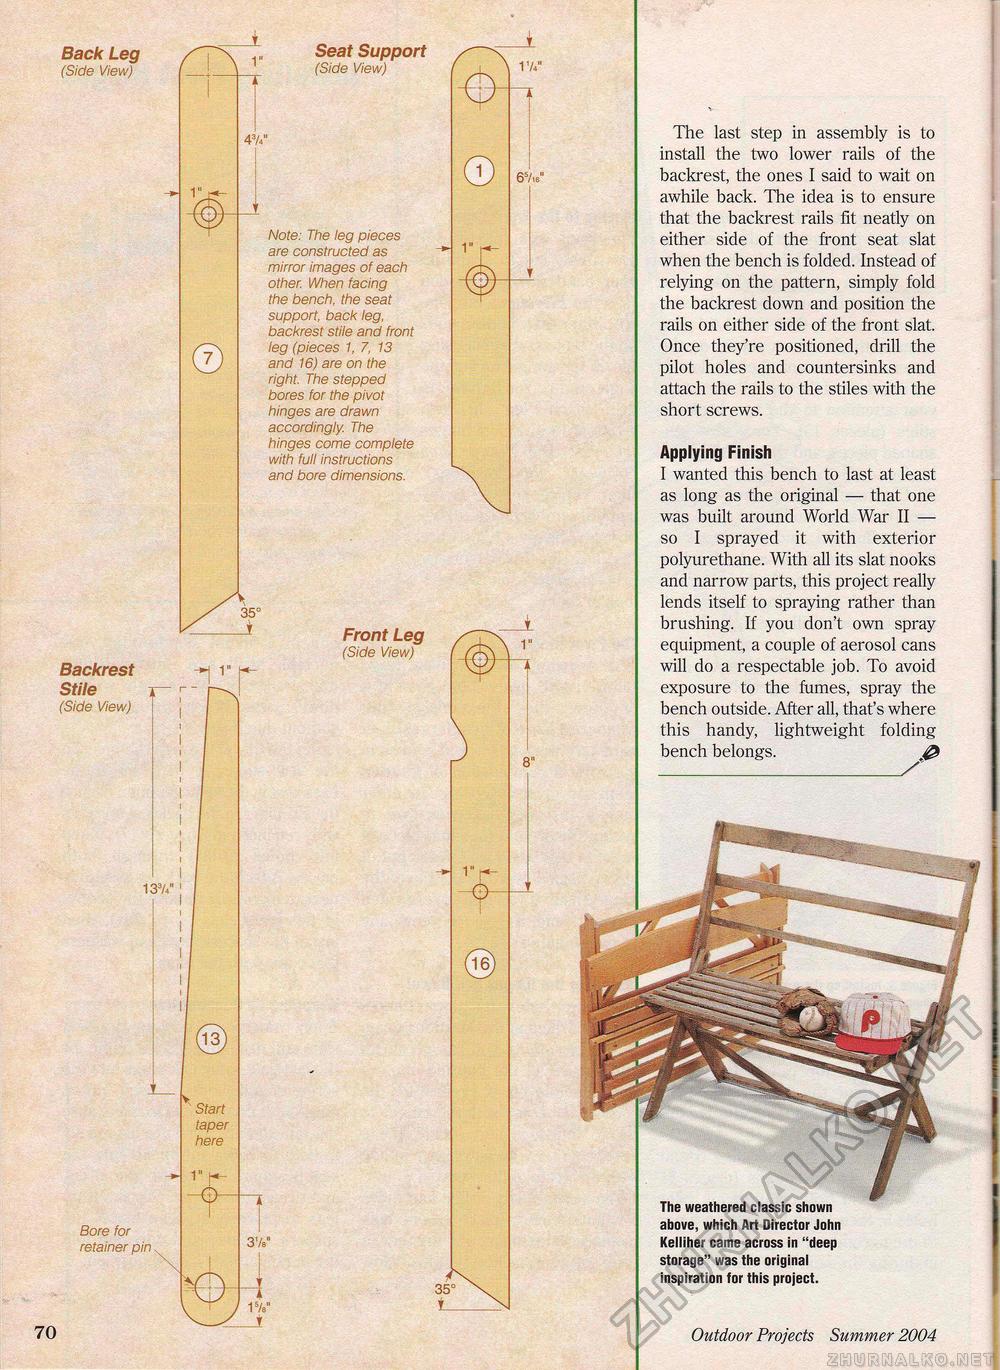
Back Leg (Side View) ® Seat Support (Side View) 47/ Note: The leg pieces are constructed as mirror images of each other. When facing the bench, the seat support, back leg, backrest stile and front leg (pieces I, 7, 13 and 16) are on the right. The stepped bores for the pivot hinges are drawn accordingly. The hinges come complete with full instructions and bore dimensions. 17/ Backrest Stile (Side View) Front Leg (Side View) 1" 137/ Bore for retainer pin. 1"i The last step in assembly is to install the two lower rails of the backrest, the ones I said to wait on awhile back. The idea is to ensure that the backrest rails fit neatly on either side of the front seat slat when the bench is folded. Instead of relying on the pattern, simply fold the backrest down and position the rails on either side of the front slat. Once they're positioned, drill the pilot holes and countersinks and attach the rails to the stiles with the short screws. Applying Finish I wanted this bench to last at least as long as the original — that one was built around World War II — so I sprayed it with exterior polyurethane. With all its slat nooks and narrow parts, this project really lends itself to spraying rather than brushing. If you don't own spray equipment, a couple of aerosol cans will do a respectable job. To avoid exposure to the fumes, spray the bench outside. After all, that's where this handy, lightweight folding bench belongs. @ The weathered classic shown above, which Art Director John Kelliher came across in "deep storage" was the original inspiration for this project. 70 Outdoor Projects Summer 2004 £ |


